Hindustan Hamara..........
Saturday, August 15, 2009
Friday, August 14, 2009
Execute/Run code after main() function returns
Recently one of my friends asked me whether it is possible to run/execute code after main() returns; provided the condition that we cannot use atexit() to register a function to run after main() returns.
Here’s my take at it:
A little explanation:
In this program, I have made the main() function naked. This will instruct the compiler NOT to emit the prolog and the epilog code. And as we know that it is the prolog code that make the stack frame for a new function call by pushing the frame pointer 'ebp' and making the new frame pointer equal to the current stack pointer 'esp'.
A general prolog looks something like this:
The epilog code does the reverse of whatever has been done in the prolog code. A typical epilog looks something like below
Also as we know that when a function is called the stack looks something like this
But without the prolog code the stack at the function call time looks something like this
This is because there is no code emitted by the compiler that does the task of saving the frame pointer and making room for the local variables. So as we can see, the return address is at the top of the stack, which we can easily remove from the stack using a 'pop' and 'push' our address there.
PS: If someone reading this has a different solution or idea, please leave a comment.
Here’s my take at it:
#include <iostream>
using namespace std;

void lastfn(void)
{
 cout<<"This is executed after main()"<<endl;
 exit(0); //No more messing with the stack.
}

/*
Lets make main() 'naked' so that there is no prolog or epilog
appended to the function. So when we enter into the function,
return address is on the top of the stack.
*/
__declspec (naked) void  __cdecl main(int count, char* vector[])
{
 long retaddr;

 __asm{
  pop retaddr  //pop the actual return address
  push lastfn  //push the new address where we
     //want control after main
 }

 cout<<"Main routine"<<endl;

 __asm{
  retn
 }
}
A little explanation:
In this program, I have made the main() function naked. This will instruct the compiler NOT to emit the prolog and the epilog code. And as we know that it is the prolog code that make the stack frame for a new function call by pushing the frame pointer 'ebp' and making the new frame pointer equal to the current stack pointer 'esp'.
A general prolog looks something like this:
  push        ebp                ; Save ebp
  mov         ebp, esp           ; Set stack frame pointer
  sub         esp, localbytes    ; Allocate space for locals
  push                ; Save registers
The epilog code does the reverse of whatever has been done in the prolog code. A typical epilog looks something like below
pop     ; Restore registers
mov  esp, ebp      ; Restore stack pointer
pop  ebp           ; Restore ebp
ret                ; Return from function
Also as we know that when a function is called the stack looks something like this
High Address

|                   |
|-------------------|
|  Input arguments  |
|-------------------|
|  Return Address   |
|-------------------|
|   Saved ebp       |
|-------------------|
|  Local variables  | top of stack
|-------------------|
|                   |

Low Address
But without the prolog code the stack at the function call time looks something like this
High Address

|                   |
|-------------------|
|  Input arguments  |
|-------------------|
|  Return Address   | top of stack
|-------------------|
|                   |

Low Address
This is because there is no code emitted by the compiler that does the task of saving the frame pointer and making room for the local variables. So as we can see, the return address is at the top of the stack, which we can easily remove from the stack using a 'pop' and 'push' our address there.
PS: If someone reading this has a different solution or idea, please leave a comment.
Wednesday, July 15, 2009
"C" calling convention
So, what the hell is a calling convention ?
Calling convention is a scheme that specifies how the called function receives the parameter from the caller function and how it sends the results back to the caller function.
Calling conventions can differ in the following respects:
1. Setting up and clearing of the function call(stack frame) between the caller and the callee.
2. How the parameters are being passed from the caller to the callee; i.e. whether the parameters are passed in the registers or on the stack or on both.
3. The order in which the parameters are passed; i.e. from left to right or from right to left.
Here I am going to explain the C calling convention. The calling convention divides the rules between the caller and the callee.
Callers' rule:
1. Save the registers: EBX, ECX, EDX etc. so that their contents are not disturbed during the function call.
2. Push the arguments on the stack from right to left.
3. Call the subroutine.
4. Clean the stack.
5. Get the return status from the subroutine in EAX register.
6. Pop the registers back.
Callee's rule:
1. Save the EBP register, to preserve the stack frame.
2. Move the ESP register into EBP register, make a new stack frame.
Note: The caller does not expect the callee to change the EBP register.
3. Make room for the local variables. As with parameters the local variables will be accessed relative to the EBP register.
4. Save the "callee saved" registers,these are EDI and ESI
5. //Code the callee wants to execute.
6. Place the return value in the EAX register.
7. Restore the values of any "Callee saved" registers i.e. ESI and EDI. Registers must be popped in the reverse order of pushing.
8. Free up the local variables by adding some amount to the ESP register. A less error prone way is to "mov %esp %ebp".
9. Immediately before returning, restore the caller’s base pointer by popping the EBP register off the stack.
Remember, this was the first thing that we did, on entering the subroutine.
10. Finally we do a RET, this will pop off the return address and make a jump to it.
Hope this explains the C calling convention......
Monday, July 13, 2009
extern “C” and __cdecl
In short:
__cdecl is the “C” calling convention whereas
extern “C” is the “C” naming convention.
C as well as C++ code may have __cdecl as the calling convention.
C++ code uses extern “C” to denote that the function is “C” function and the compiler should not mangle the name of the function in the generated object code.
If C++ code uses __cdecl before the function; this means that it follows the “C” calling convention but C++ naming convention; it will have mangled names.
If a C++ code uses both the extern “C” as well as __cdecl it means that the said function uses “C” calling convention as well as the “C” naming convention. The name of the function will be same in the generated object code. There will be no name mangling.
Tuesday, June 23, 2009
Official F*ck count of the linux 2.6.30 kernel
Yesterday I downloaded and compiled the 2.6.30 linux kernel source from http://kernel.org/. After booting from the newly compiled kernel I thought of counting the "Official Fuck Count" of the 2.6.30 kernel.
Here's the result:
That's total of 32 count in 19 files.
Also have a look at this site http://www.vidarholen.net/contents/wordcount/. It has a graph of all the swear words used in the linux kernel.
Here's the result:
[vijaush@pheonix linux-2.6.30]$ find . -exec grep -i fuck {} \; -print
 * (And this is the fucking 'basic' method).
./net/ipv4/netfilter/nf_nat_snmp_basic.c
   /* Fuck, we are miserable poor guys... */
./net/core/skbuff.c
 /* If you fuck with this, update ret_from_syscall code too. */ \
./arch/sparc/include/asm/system_64.h
 /* XXX Fucking Cypress... */
./arch/sparc/kernel/head_32.S
/*  Some BIOS's are fucked and don't set all MTRRs the same!  */
./arch/x86/kernel/cpu/mtrr/generic.c
 * Some Athlon laptops have really fucked PST tables.
./arch/x86/kernel/cpu/cpufreq/powernow-k7.c
  * fucking with the memory controller because it needs to know the
./arch/mips/sgi-ip22/ip22-setup.c
  * IOC3 is fucked fucked beyond believe ...  Don't even give the
  * IOC3 is fucked fucked beyond believe ...  Don't even give the
  * IOC3 is fucked fucked beyond believe ...  Don't try to access
  * IOC3 is fucked fucked beyond believe ...  Don't even give the
  * IOC3 is fucked fucked beyond believe ...  Don't even give the
  * IOC3 is fucked fucked beyond believe ...  Don't try to access
  * IOC3 is fucked fucked beyond believe ...  Don't even give the
  * IOC3 is fucked fucked beyond believe ...  Don't even give the
  * IOC3 is fucked fucked beyond believe ...  Don't try to access
  * IOC3 is fucked fucked beyond believe ...  Don't even give the
  * IOC3 is fucked fucked beyond believe ...  Don't even give the
  * IOC3 is fucked fucked beyond believe ...  Don't try to access
./arch/mips/pci/ops-bridge.c
/* master list of VME vectors -- don't fuck with this */
./arch/m68k/include/asm/sun3ints.h
/* Fucking broken ABI */
./arch/parisc/kernel/sys_parisc.c
  * What the fuck is going on here?  We leave junk in the beginning
./sound/oss/opl3.c
 case XFS_BTNUM_MAX: ASSERT(0); /* fucking gcc */ ; break; \
 case XFS_BTNUM_MAX: ASSERT(0); /* fucking gcc */ ; break; \
./fs/xfs/xfs_btree.h
/* Only Sun can take such nice parts and fuck up the programming interface
  /* This card is _fucking_ hot... */
./drivers/net/sunhme.c
 *  These chips are basically fucked by design, and getting this driver
./drivers/ide/cmd640.c
    registered, to prevent the link/init ordering from fucking
./drivers/mtd/mtd_blkdevs.c
  * brain-damage, it's managed to fuck things up one step further..
./drivers/watchdog/shwdt.c
/* Am I fucking pedantic or what? */
./drivers/scsi/qlogicpti.h
        BUG? Why does turning the chroma comb on fuck up color?
./drivers/media/video/bt819.c
 * Wirzenius wrote this portably, Torvalds fucked it up :-)
./lib/vsprintf.c
[vijaush@pheonix linux-2.6.30]$
That's total of 32 count in 19 files.
Also have a look at this site http://www.vidarholen.net/contents/wordcount/. It has a graph of all the swear words used in the linux kernel.
Monday, June 22, 2009
Logging into Fedora 11 as the root user
Today i tried to log into my system as the 'root' user and GDM will not allow me to log into the system. Looks like that GDM does not allow root user to log into the GUI mode.
To overcome this limitation, you can edit the

That's it, restart the GDM and login as 'root' user.
To overcome this limitation, you can edit the
/etc/pam.d/gdm-password file and comment the line saying:auth required pam_succeed_if.so user != root quiet
That's it, restart the GDM and login as 'root' user.
Friday, June 12, 2009
Google suggestion
Recently I was searching for a "How to" on LFS (Linux From Scratch), so I opened up http://www.google.com and typed in the following keywords "How to" and here's what Google suggestion came up with first.

I am preety sure, I know that !!! *LOL*

I am preety sure, I know that !!! *LOL*
Thursday, June 11, 2009
Installing Mac OS X on PearPc
hey,
It has been really long since I have written anything in here.
Recently while I was surfing the Internet, I came across this site http://pearpc.sourceforge.net/ . Its an emulator for PowerPC computers. The screen shot of MAC running on it is really nice, so I thought to give it a try; and I was successful in installing the same.
Here's what you will need to install MAC on PearPC emulator.
1.Mac OS X DVD image.
2.PearPC emulator ( http://pearpc.sourceforge.net/ or http://www.pearpc.net/ )
Note: I first tried to compile the source packages downloaded from http://pearpc.sourceforge.net/ but they would not compile properly. You need to apply a patch for it. The packages from http://www.pearpc.net/ are good to start as they already contain the binary and a GUI to configure the virtual machine.
After having the required components, lets get started:
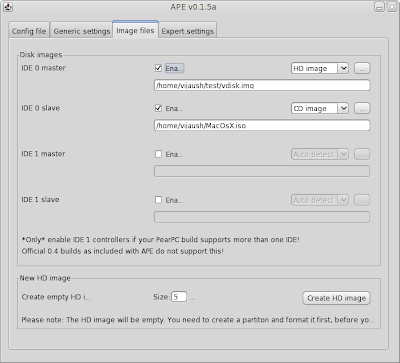
Firstly create a 6 GB file using the 'dd' command in Linux or using the GUI from the PearPC.net package. This file will server as the 'disk' for the virtual machine.
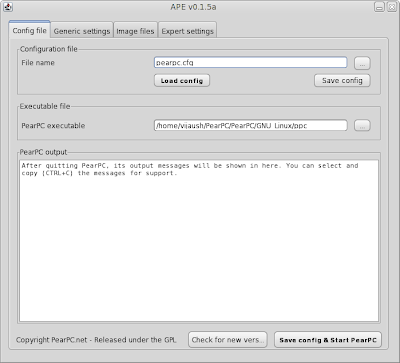
Next we will use the associated GUI ($ java -jar APE.jar or you can use the script file to start the GUI) to configure our virtual machine. The main settings are these:
and the settings for the Installation DVD and virtual disk image
After completing these settings go back to the 'Config file' tab and click on 'Save config and start PearPC' button. This will bring up the emulator screen as follows:
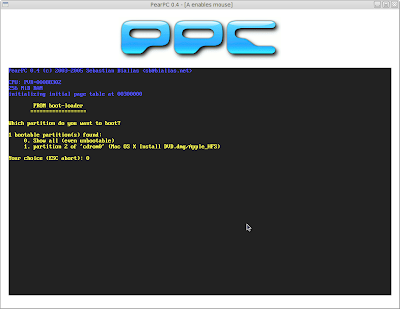
Select CDROM option and hit enter. This will start the Mac OS X installation program.
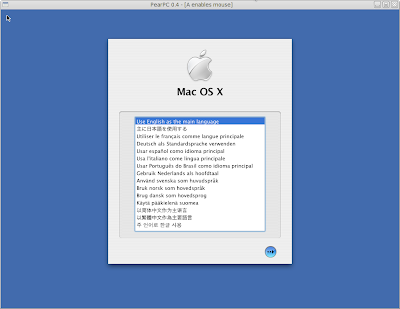
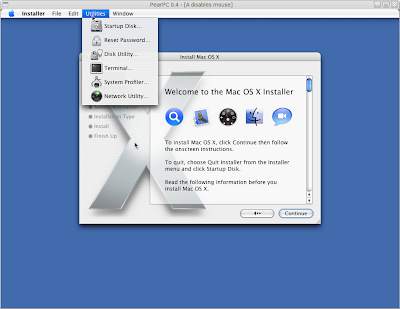
Next comes this

At this point we need to partition the virtual disk drive. So Goto Utilities > Disk Utility
This will bring you to this screen
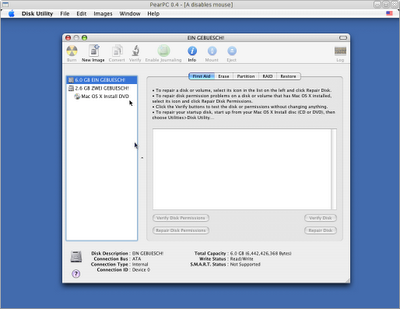
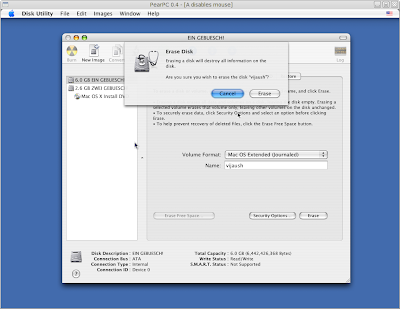
The first one is the virtual disk, We need to format it. Remember to format the partition as "Mac OS Extended (journaled)" otherwise you will not be able to boot from that partition. I had done this mistake once; I formatted the partition as "Unix filesystem" and I was not able to boot from the virtual disk.
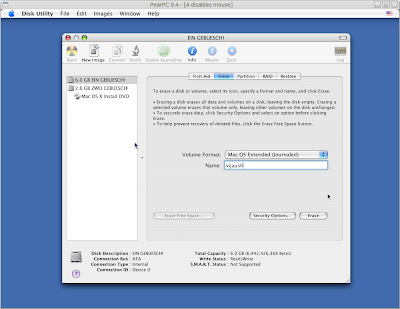
confirm to delete the existing data and format it.
After the format it will show you this screen. You will have a partition in the virtual disk.
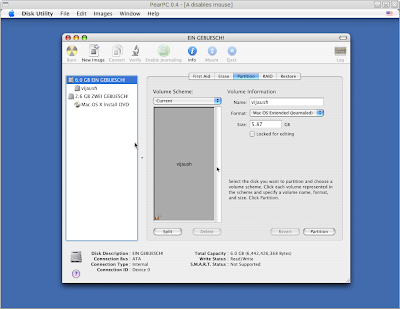
After the partition is created on the virtual disk, we can now proceed with the installation program. You can just close the 'Disk Utility' application.
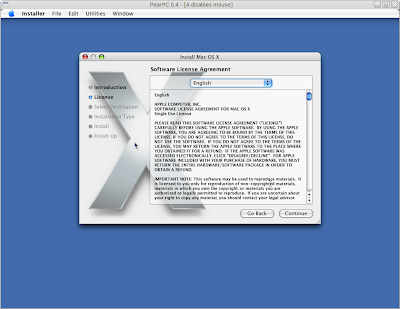
Select the language of the installation and click 'Continue'
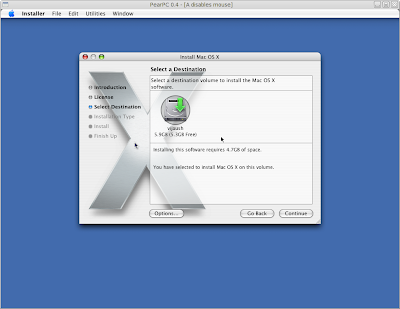
Now select the disk and proceed with the installation.
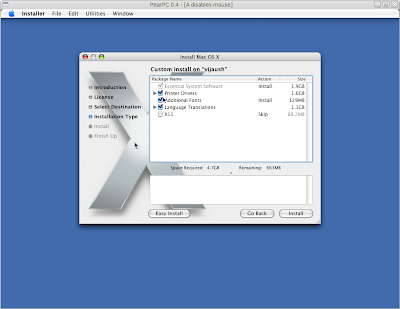
Here you can 'Customize' the packages that will be installed on the system. Click Install to continue with the installation.
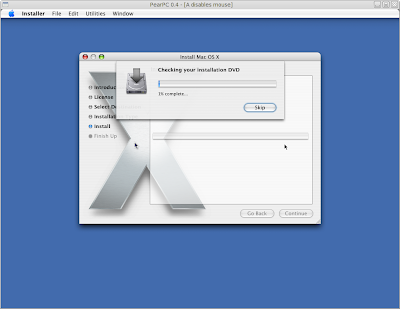
The installer will check for the integrity of the install DVD. You can skip this step if you want.
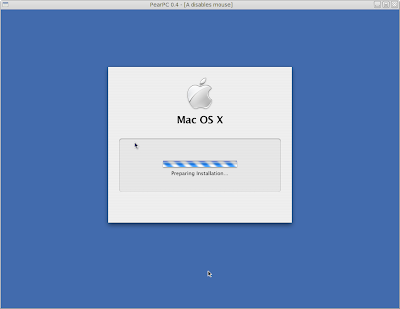
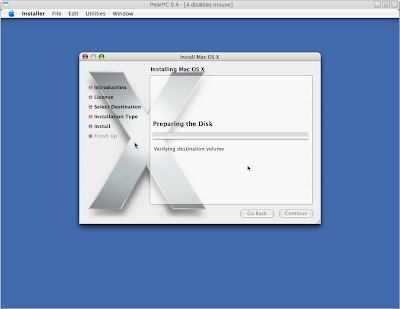
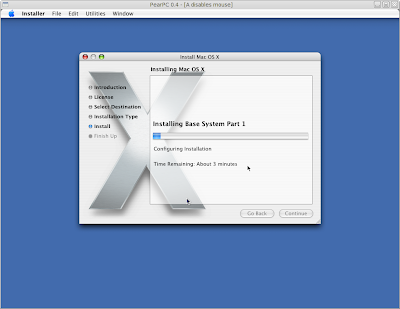
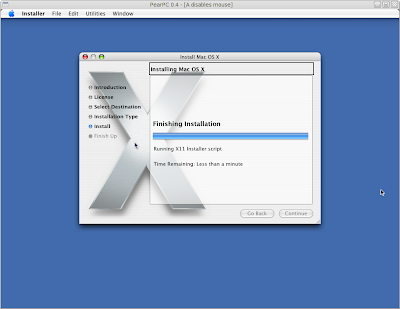
After this the installation begins:
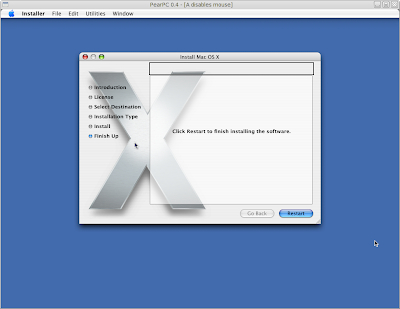
After this Restart the PearPc emulator.
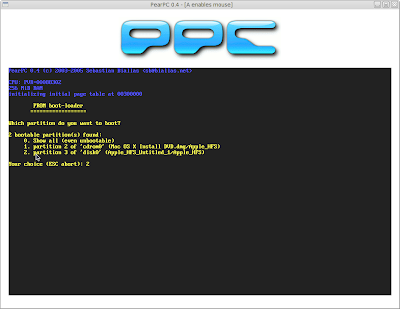
You can see, there is an additional entry "to boot from the virtual disk". Select the option to boot from the disk, and we are good to go :)
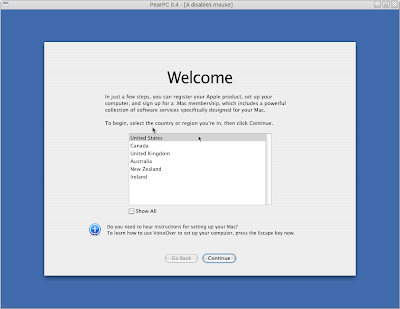
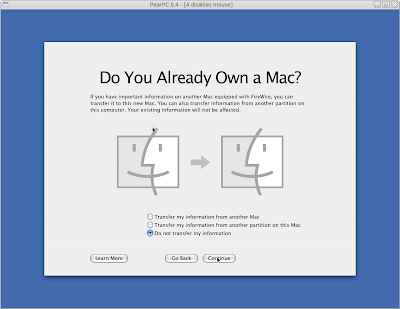
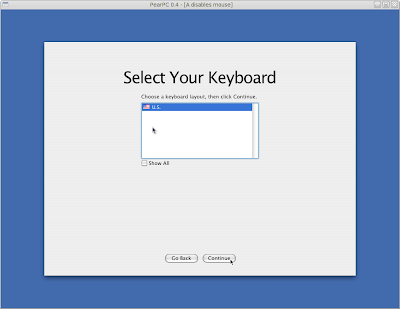
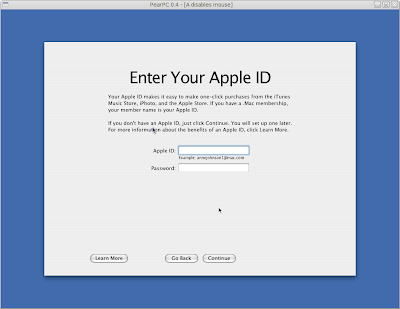
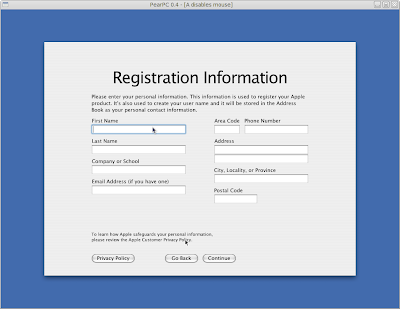
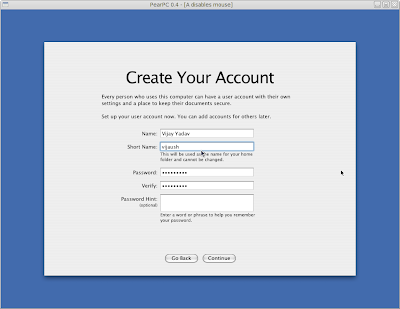
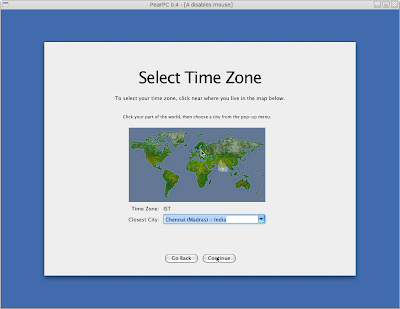
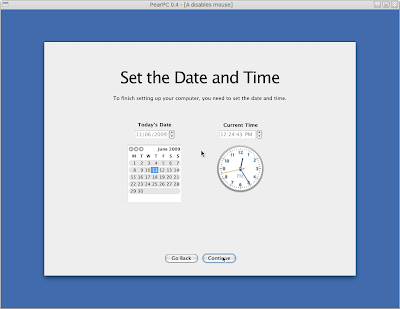
This will bring us to the welcomes screen. Complete all the initial setup and create a user account.
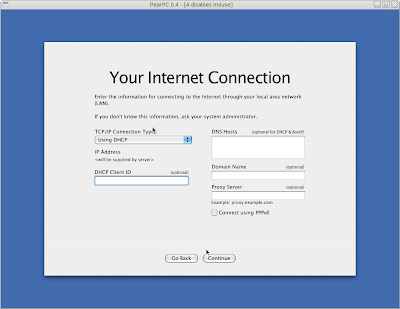
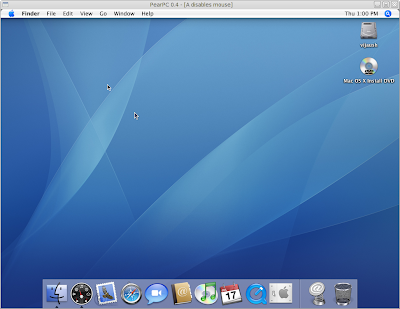
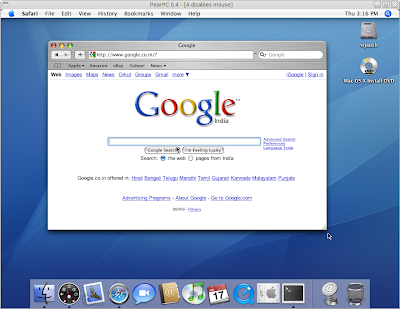
And here we are, at the Desktop. I followed the tutorial at the PearPC wiki and finally got my virtual machine connected to the Internet.
Here is the tutorial: http://wiki.pearpc.net/index.php?title=Networking
And the final screen shot
Looks good !!
Isn't it !! :)
It has been really long since I have written anything in here.
Recently while I was surfing the Internet, I came across this site http://pearpc.sourceforge.net/ . Its an emulator for PowerPC computers. The screen shot of MAC running on it is really nice, so I thought to give it a try; and I was successful in installing the same.
Here's what you will need to install MAC on PearPC emulator.
1.Mac OS X DVD image.
2.PearPC emulator ( http://pearpc.sourceforge.net/ or http://www.pearpc.net/ )
Note: I first tried to compile the source packages downloaded from http://pearpc.sourceforge.net/ but they would not compile properly. You need to apply a patch for it. The packages from http://www.pearpc.net/ are good to start as they already contain the binary and a GUI to configure the virtual machine.
After having the required components, lets get started:
Firstly create a 6 GB file using the 'dd' command in Linux or using the GUI from the PearPC.net package. This file will server as the 'disk' for the virtual machine.
Next we will use the associated GUI ($ java -jar APE.jar or you can use the script file to start the GUI) to configure our virtual machine. The main settings are these:

and the settings for the Installation DVD and virtual disk image

After completing these settings go back to the 'Config file' tab and click on 'Save config and start PearPC' button. This will bring up the emulator screen as follows:

Select CDROM option and hit enter. This will start the Mac OS X installation program.


Next comes this

At this point we need to partition the virtual disk drive. So Goto Utilities > Disk Utility

This will bring you to this screen

The first one is the virtual disk, We need to format it. Remember to format the partition as "Mac OS Extended (journaled)" otherwise you will not be able to boot from that partition. I had done this mistake once; I formatted the partition as "Unix filesystem" and I was not able to boot from the virtual disk.

confirm to delete the existing data and format it.

After the format it will show you this screen. You will have a partition in the virtual disk.

After the partition is created on the virtual disk, we can now proceed with the installation program. You can just close the 'Disk Utility' application.

Select the language of the installation and click 'Continue'

Now select the disk and proceed with the installation.

Here you can 'Customize' the packages that will be installed on the system. Click Install to continue with the installation.

The installer will check for the integrity of the install DVD. You can skip this step if you want.
After this the installation begins:


After this Restart the PearPc emulator.

You can see, there is an additional entry "to boot from the virtual disk". Select the option to boot from the disk, and we are good to go :)

This will bring us to the welcomes screen. Complete all the initial setup and create a user account.


And here we are, at the Desktop. I followed the tutorial at the PearPC wiki and finally got my virtual machine connected to the Internet.
Here is the tutorial: http://wiki.pearpc.net/index.php?title=Networking
And the final screen shot

Looks good !!
Isn't it !! :)
Saturday, April 11, 2009
Change return address on stack through buffer overflow (Windows version)
Here is the windows version of the same program.
#include<stdio.h>
#include<stdlib.h>
#include<string.h>
void shankar()
{
printf("\n\nAey,\nWhat's up doc :) \n\n");
exit(10) ;
}
void vijay(char *input)
{
char buffer[14];
strcpy(buffer,input);
}
int main()
{
//print some useful information for the hack
printf("main=%p\n",main);
printf("vijay=%p\n",vijay);
printf("shankar=%p\n",shankar);
vijay("ABCDEFGHIJKLMNOPQRVS\xdc\x10\x41\x00");
return 0;
}
This program works same as the linux version, there is however a difference; the C compiler on windows places some extra data on the stack just after the return address (notice the length of the garbage string is 2 bytes more in this case as compared to the linux version); it does it so that it can verify after the function return that the return address is not tampered.
To make this program work, turn off "Buffer security check" using /GS- option from the command line or through the program properties in visual studios, else you might not get upto the return address and even if you managed to find the return address on the stack and change it, you will not able to execute it because the system will come to know that the return address is tampered and it will stop the execution of the program.

You need to change the return address in the string that is passesd to vijay() function else the program will segfault. The manner in which the return address is written remain the same for both linux and windows.
Hope you all find this a bit useful ;)
#include<stdio.h>
#include<stdlib.h>
#include<string.h>
void shankar()
{
printf("\n\nAey,\nWhat's up doc :) \n\n");
exit(10) ;
}
void vijay(char *input)
{
char buffer[14];
strcpy(buffer,input);
}
int main()
{
//print some useful information for the hack
printf("main=%p\n",main);
printf("vijay=%p\n",vijay);
printf("shankar=%p\n",shankar);
vijay("ABCDEFGHIJKLMNOPQRVS\xdc\x10\x41\x00");
return 0;
}
This program was compiled on windows using Visual Studios 2008
This program works same as the linux version, there is however a difference; the C compiler on windows places some extra data on the stack just after the return address (notice the length of the garbage string is 2 bytes more in this case as compared to the linux version); it does it so that it can verify after the function return that the return address is not tampered.
To make this program work, turn off "Buffer security check" using /GS- option from the command line or through the program properties in visual studios, else you might not get upto the return address and even if you managed to find the return address on the stack and change it, you will not able to execute it because the system will come to know that the return address is tampered and it will stop the execution of the program.

You need to change the return address in the string that is passesd to vijay() function else the program will segfault. The manner in which the return address is written remain the same for both linux and windows.
Hope you all find this a bit useful ;)
Thursday, April 9, 2009
Change return address on stack through buffer overflow (Linux)
Ok, i know that i am late; and i should have written this way long before; but anyways, better late than never :)
As said in the previous post, i am going too tell something about changing the return address on the stack through buffer overflow. Please keep in mind that it is not very fancy; its just for the beginners; i am still learning ;)
So, the code goes as:
#include<stdio.h>
#include<stdlib.h>
#include<string.h>
void bar()
{
printf("\n\nAey,\nWhat's up doc :) \n\n");
exit(10) ;
}
int foo(char *input)
{
char buffer[14];
strcpy(buffer,input);
}
int main()
{
//print some useful information
printf("main=%p\n",main);
printf("foo=%p\n",foo);
printf("bar=%p\n",bar);
foo("ABCDEFGHIJKLMNOPQR\x24\x84\x04\x08");
return 0;
}
Code explanation:
Here, we have three function; the good old main() our entry point to the application; then we have the foo() function and the bar() function.
In the main() we are just printing the addresses of the functions in the memory; and then there is a call to the foo() function. Please note that the bar() function is never called; it is not in the control flow of the program. My aim was to somehow replace the address on the stack so that the bar() function is called automatically, when the foo() function returns.
The core of the logic ( if you say so :) ) is in the foo() function. Note the strcpy() operation; we are copying more data in the less space; hence it results in a buffer overflow. This overflowed data is then spilt over other information on the stack including the return address on the stack.
At this point when foo() function is executing, the stack looks something like this:
From the figure above we can easily see that the return address is at an offset of 18 bytes from the buffer; 14 bytes for the buffer and 4 bytes for the stack frame pointer. So if we copy more then 14 bytes in buffer we will overwrite the stack frame pointer and if we copy more than 18 bytes into the buffer we can easily overwrite the return address on the stack, and there is on one who will stop you from doing this :)
The next question is how to write the return address?
As this code is written on intel machine which is a "little endian" machine; you write the little end of the address first and then the higher end of the address. Say for example, if the address is 0x08048454 the string representation of the same will be \x54\x84\x04\x08. We start with the little end of the address.
If you compile this code on your machine, the address of the bar() function will be different on your system, so just change the return address in the string that is passed to the foo() function as told above and you are ready to go.
Please note that Linux now provides what is called Address Space Randomization. This means that each time your application is loaded into the memory, it is loaded at some random address. This will change the address of the functions every time they are executed. This in turn will render this address changing on the stack useless. To overcome this turn off Address Space Randomization in Linux as follows:
$ echo 0 > /proc/sys/kernel/randomize_va_space
This will make sure that the functions are loaded at the same virtual address every time.
As said in the previous post, i am going too tell something about changing the return address on the stack through buffer overflow. Please keep in mind that it is not very fancy; its just for the beginners; i am still learning ;)
So, the code goes as:
#include<stdio.h>
#include<stdlib.h>
#include<string.h>
void bar()
{
printf("\n\nAey,\nWhat's up doc :) \n\n");
exit(10) ;
}
int foo(char *input)
{
char buffer[14];
strcpy(buffer,input);
}
int main()
{
//print some useful information
printf("main=%p\n",main);
printf("foo=%p\n",foo);
printf("bar=%p\n",bar);
foo("ABCDEFGHIJKLMNOPQR\x24\x84\x04\x08");
return 0;
}
This code is written on a linux machine, the same will not work on windows machines. It turns out that C compiler on windows places some more information on the stack after the stack frame pointer.
Code explanation:
Here, we have three function; the good old main() our entry point to the application; then we have the foo() function and the bar() function.
In the main() we are just printing the addresses of the functions in the memory; and then there is a call to the foo() function. Please note that the bar() function is never called; it is not in the control flow of the program. My aim was to somehow replace the address on the stack so that the bar() function is called automatically, when the foo() function returns.
The core of the logic ( if you say so :) ) is in the foo() function. Note the strcpy() operation; we are copying more data in the less space; hence it results in a buffer overflow. This overflowed data is then spilt over other information on the stack including the return address on the stack.
At this point when foo() function is executing, the stack looks something like this:
HIGH ADDRESS                                   LOW ADDRESS
-------------------------------------------------------------------------------------------
input | return address (4 bytes)  | sfp (4 bytes)  | buffer (14 bytes) |
-------------------------------------------------------------------------------------------
                           Stack grows this way ------->
From the figure above we can easily see that the return address is at an offset of 18 bytes from the buffer; 14 bytes for the buffer and 4 bytes for the stack frame pointer. So if we copy more then 14 bytes in buffer we will overwrite the stack frame pointer and if we copy more than 18 bytes into the buffer we can easily overwrite the return address on the stack, and there is on one who will stop you from doing this :)
The next question is how to write the return address?
As this code is written on intel machine which is a "little endian" machine; you write the little end of the address first and then the higher end of the address. Say for example, if the address is 0x08048454 the string representation of the same will be \x54\x84\x04\x08. We start with the little end of the address.
If you compile this code on your machine, the address of the bar() function will be different on your system, so just change the return address in the string that is passed to the foo() function as told above and you are ready to go.
Please note that Linux now provides what is called Address Space Randomization. This means that each time your application is loaded into the memory, it is loaded at some random address. This will change the address of the functions every time they are executed. This in turn will render this address changing on the stack useless. To overcome this turn off Address Space Randomization in Linux as follows:
$ echo 0 > /proc/sys/kernel/randomize_va_space
This will make sure that the functions are loaded at the same virtual address every time.
Wednesday, March 25, 2009
Stack and Assembly
Its long time, I've written something here. Actually was busy with my project, which finally completed yesterday. So for some time now I am kinda free; I am trying to utilize this time to do something useful and something that I've always wanted; that is to learn "Assembly language". I particularly like the tricks with the stacks and the small and smart tricks that can be done with the Assembly language.
So, keeping this thing in mind I have started out with Assembly. As of now I have set 2 tasks for myself:
1. To change the return address on the stack.(should be easy one :) )
2. To execute a shellcode and spawn a shell.
Lets see, how does it goes. If I succeed in doing these, then maybe I will post a small howto of the same.
Thursday, March 12, 2009

Thursday, February 26, 2009
KDM Login
I finally successfully installed both Windows XP and Fedora 10 (Both KDE and GNOME) on my acer aspire whose pre-installed OS (Linpus Linux) had been screwed by me earlier. Windows fonts were fine for the small screen, but i had to manually change the default fonts both in KDE and GNOME. The default fonts were too large for the small screen of aspire one. What took me more time figuring out was the font size of KDM login screen. After much going about the filesystem, i fixed it today.
It goes as follows; the file
It goes as follows; the file
/etc/kde/kdm/kdmrc is the configuration file for the KDM. In this file under the [X-*-Greeter] section there is a Theme option that points to the folder containing the currently used KDM theme. After this all that needs to be done was to edit the xml configuration file.
Saturday, February 21, 2009
My first netbook - Acer Aspire One

Hey,
guess what ?? today i purchased my first ever laptop and its Acer Aspire One :) Went in the evening to Nehru place with Sunder (my colleague in the office) and brought it. Its configuration is quiet good for what one could expect from a laptop that comes for just Rs. 17550/ Yes, i brought it for that much. I brought the blue one with Linux as the Operating System. It has 1 Gig of RAM, 160 gigs of hard-disk, Ethernet, Wifi, Web-cam, Speakers, audio-jacks, microphone, USB, card-readers, the screen is just 8.9 inches, which can be a problem in some situations. Lets hope those situations don't come.
The first thing i did after coming home was to have a look at the accompanying documents, although i did not read them, and then i screwed the system in just 30 minutes. Now, I am not able to boot in the gui nor to the command line. It's kinda sad, but i cannot blame anyone else except for me. Actually i was just trying to find out which kernel version was used, what is the desktop environment (i have never seen like this ever), which distribution etc. I was quiet successful in my attempts, before i screwed up everything; like i came to know that they used Fedora 8 (werewolf) to build the kernel(kernel version 2.6.something), used XFCE as the desktop enviorment, and some Acer customized packages.
So, i am back again to ground zero, using my friends machine to write this post, but i'll fix it soon. I am planning to install Fedora 10 on it with all the eye candies. I'll do the installation tomorrow..........
Tuesday, January 27, 2009
Download videos from Youtube
There is this very nifty thing that comes along with fedora, they are:
You can download any video from youtube by
To download the video from youtube:
eg.
And to convert them to avi format
or
to convert them to mpg.
you can convert the videos to any format that you want. Just go through the man page of youtube-dl and ffmpeg to discover all their abilities. :)
youtube-dl and ffmpeg. If you don't already have them on your system then you can install it through yum.yum install youtube-dl ffmpegYou can download any video from youtube by
youtube-dl and convert them to your desired format using ffmpeg.To download the video from youtube:
$ youtube-dl <url> -o <filename>eg.
$ youtube-dl http://in.youtube.com/watch?v=mCMuDP0Qhq0 -o AmericanPie.flvAnd to convert them to avi format
$ ffmpeg -i AmericanPie.flv americanPie.avior
$ ffmpeg -i AmericanPie.flv americanPie.mpgto convert them to mpg.
you can convert the videos to any format that you want. Just go through the man page of youtube-dl and ffmpeg to discover all their abilities. :)
Thursday, January 15, 2009
Fedora 10 - Fire it up

I was thinking of doing it since long, and finally I did it today. Yes !!! today i moved on from Fedora 7 to Fedora 10. I also have used Fedora 9 but it didn't impressed me much, so I switched back to using Fedora 7. This release of Fedora is what Fedora core 6, for the previous versions of Fedora.
This release has a lot of improvements and a loads of eye candy. I specially liked the
rhgb replacement called Plymouth. I loved the "Solar" plymouth plugin. It took me some work to get the Solar theme working, but the work was worth it :)For those of you who are still trying to get the Plymouth theme working, here it goes. Open /etc/grub.conf in your favorite text editor and add the line
vga=ask at the end of the "kernel" line, and save the file and reboot the system. When Fedora boots, it will show the possible VGA resolutions for your monitor. Select the resolution that best fits your monitor, and remember the code. After logging in the system, again edit the /etc/grub.conf file and replace vga=ask with the code you selected preceded by 0x. For example vga=0x31bMonday, January 12, 2009
Installing Linux/Fedora 10 on a Windows machine without CD
Have you ever faced a condition where you have to install Linux on a machine that is running windows and it doesn’t have a cdrom drive or there is no Linux installation CD available. Well there is another installation method that can be used to boot Linux installation program on windows machine and install Linux over the network.
Procurements:
The first step is to download grub loader for windows. It can be downloaded from any of the grub4dos project sites like http://sourceforge.net/projects/grub4dos
Now from the downloaded archive extract the file named “grldr”. It is the grub loader file, and the file menu.lst. This is the menu options file. This completes the first step of the process.
The second step is to get the location of the site that hosts the Linux distribution that you want to install. For example you can get the Fedora 10 installation files hosted here: ftp://ftp.jaist.ac.jp/pub/Linux/Fedora/releases/10/Fedora/i386/os/
Now download the file “vmlinuz” and “initrd.img” from here. These files can be found in the “isolinux” folder.
After the above two steps you have:
1.The Grub loader (grldr)
2.The menu.lst file
3.vmlinuz file
4.initrd.img file.
These are all the bare essentials that you need to boot the Linux installation program and install Linux on your system. Place all these file in the root drive of your windows installation, normally its C drive [c:]
Configuration:
Edit your menu.lst file. Delete entire content from the file, and add the following text to it.
~~~~~~~~~ menu.lst ~~~~~~~~~~~~~~
timout=10
title Linux/Fedora Installation
kernel /vmlinuz
initrd /initrd.img
~~~~~~~~~~~~~~~~~~~~~~~~~~~~~~~
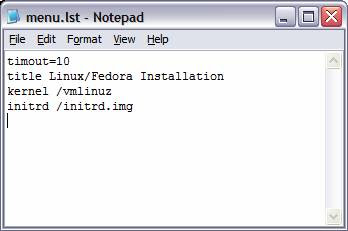
You menu.lst file should have this content only. Well it can have other setting, but all that are not necessary for the installation purpose. This is the lean mean configuration :)
The next step is to edit the windows boot.ini file. This file is normally c:\boot.ini, but it has its attribute as System, Hidden and Read-Only. If you can find the file, it’s well and good else to change the attributes open the windows command prompt and execute the following command:
attrib –s –h –r c:\boot.ini
After this step you can see the file boot.ini in your c:\ drive.
Now you need to edit this file. Open boot.ini in notepad, and append the following lines at the end of the file
c:\grldr=”Fedora Installation”
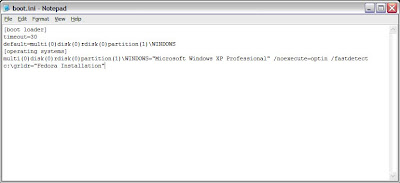
That’s it !!! All configuration completed.
What’s next ???
Nothing much, you just need to reboot your windows machine. But before rebooting please check that:
1.You have placed “grldr”,”vmlinuz”,”initrd.img” and “menu.lst” file in your root drive, mostly that’s gonna be c:\
2.You have edited your “menu.lst” file
3.You have edited your “boot.ini” file.
After these checklists, REBOOT.
After Reboot:
When your machine boots again, it will present you with a boot menu that says “Fedora Installation”. Select this option form the menu and hit enter. After this, you will be presented with a grub menu that says “Linux/Fedora Installation”. Select that option and again hit enter, and Viola !!!! You have booted the Linux Installation program.
Post steps:
Select the keyboard layout and the default language from the options that are presented. When the program asks for the installation media, select “URL” option and provide the URL from where you want to install your Linux distribution. Please note that this location has to be the same from where you have downloaded the “vmlinuz” and “initrd.img” files. In our case it will be ftp://ftp.jaist.ac.jp/pub/Linux/Fedora/releases/10/Fedora/i386/os/
It is also a good idea to set up your own ftp server, with the files extracted from the Fedora iso image, and provide its path here. This is a good idea if you do not have good internet connection, like mine :)
Hit enter and continue with the installation!!!
Subscribe to:
Posts (Atom)